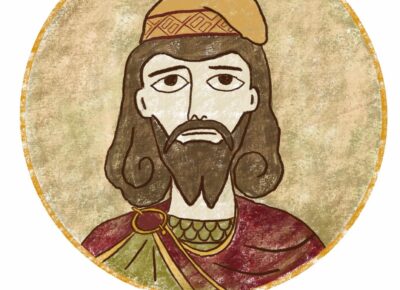
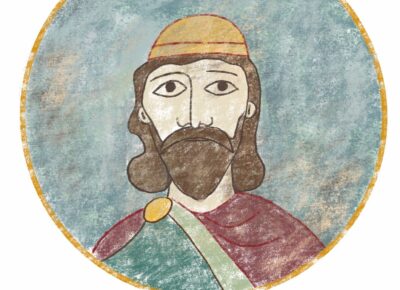
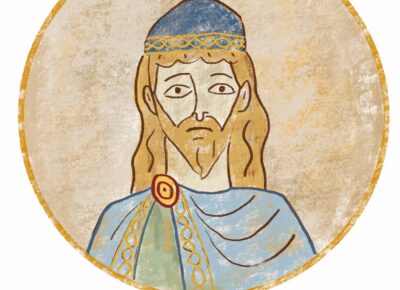
These maps illustrate the ebb and flow of different tribes and peoples across the landscape of Britain from the departure of the Romans to the day when five kings met at Eamont. This is intended as a graphical illustration of the journey to the tipping point of history when Athelstan was dominant enough to create England.
It could have been very different: a battle lost, a battle won, a king surviving, a king dying, a storm sinking ships, a storm not sinking ships and the colours on the kaleidoscope of the map shift and twist. But in many ways it would be the same. The geography of hill and river and marsh and the good agricultural land is always there and they influence the twists in the same way so that king A maybe would have done the same as king B.
The outlines of the polities [where a polity is a “society considered as a political unit”] are sketched to indicate that we cannot be definitive about many of the borders or who ruled where. The Humber is always a boundary but across much of the map we need to pick up dots where a battle was won, or coins were minted, or a charter was witnessed. And we also need to rely on the descriptions of historians who are often writing centuries after the events they describe.
The quantity of records across Britain also varies with English kings minting coins and the various versions of the Anglo-Saxon chronicles noting the more significant events of a year where the Angles, Saxons and Jutes lived. By contrast no prince or king in Wales and Scotland minted coins and the written records are sparse and are mainly references in the Anglo-Saxon Chronicles and the Annals of Ulster.
Hence please follow the maps across time with those caveats in mind.

410
Before 410 we hear from Britain through the writings of Romans. Thus, we know the names of some of the tribes, the larger rebellions and the weirder customs. We also have the record in stone – the walls, villas and roads. And when the legions were called back to Rome in 410 they left Latin embedded in the Brittonic dialects across the land.
650
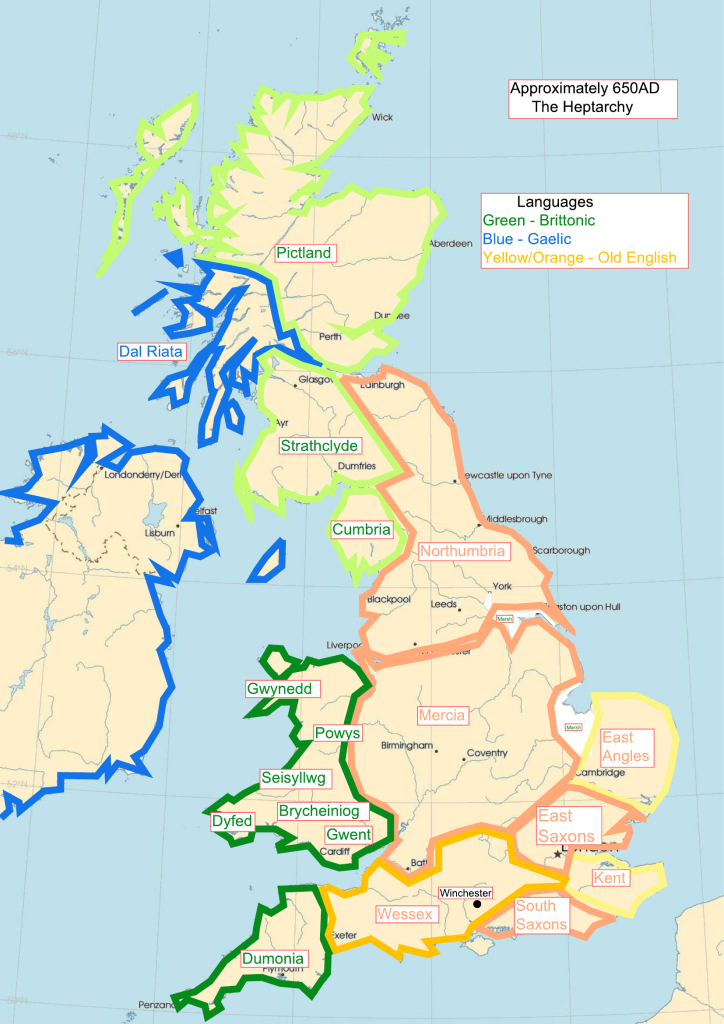
Both before and after the Roman era raiders, mercenaries and settlers came across the North Sea from the area now known as North Germany and Denmark. The historian Bede, a monk from Jarrow, wrote a history of the English church in 731 in which he also gave information about the various English kingdoms. There were also other earlier histories some of which survive. The number of kingdoms and sub-kingdoms fluctuated but this map gives the division into the most important polities. And Bede described the peoples as Angles [Northumbria, Mercia and East Anglia], Saxons [Wessex, Sussex and Essex] and Jutes [Kent] but all speaking roughly the same language now known as Old English. The Brittonic speech, and possibly the speakers, was pushed into Wales and Cornwall.
Gaelic speakers from Ireland had settled into the North-West of Pictland but the extents of both their kingdom of Dal Riata and of Pictland are largely unknown.
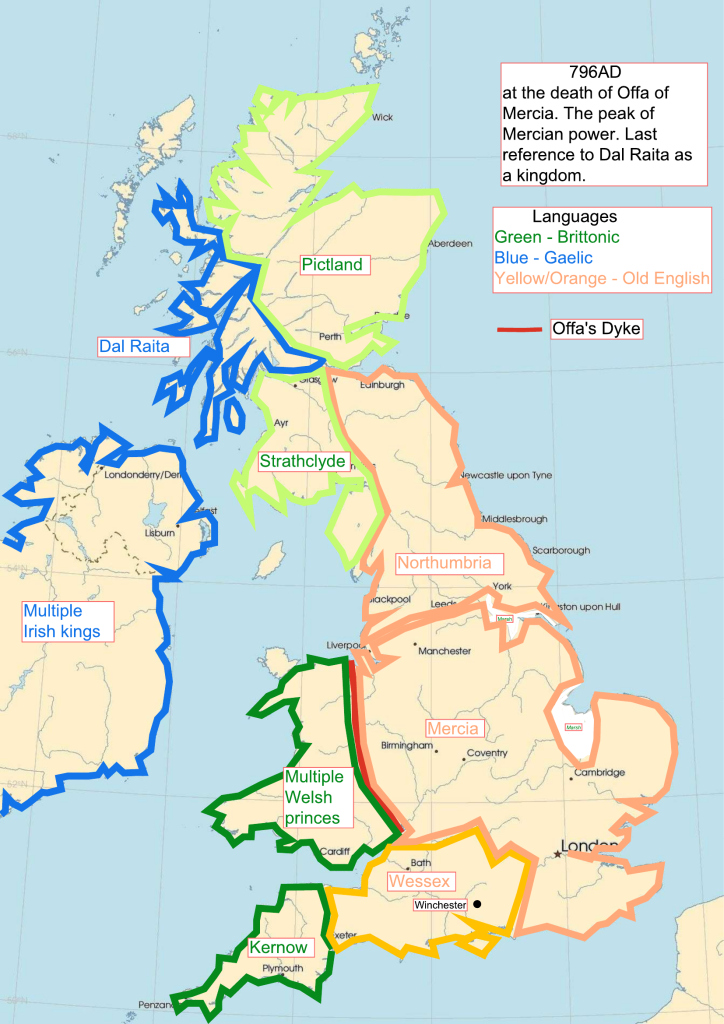
796
This shows the peak of Mercian power under King Offa who has left his name on the landscape even now by building the barrier between Mercia and Wales known as Offa’s Dyke. Northumbria remained large and powerful but the other smaller Angle and Saxon kingdoms had submitted to Offa and Wessex was restricted to the South-West. The first raid of the Vikings on the monastery of Lindesfarne took place in 793 so this map is also representing the high point before the Viking era.
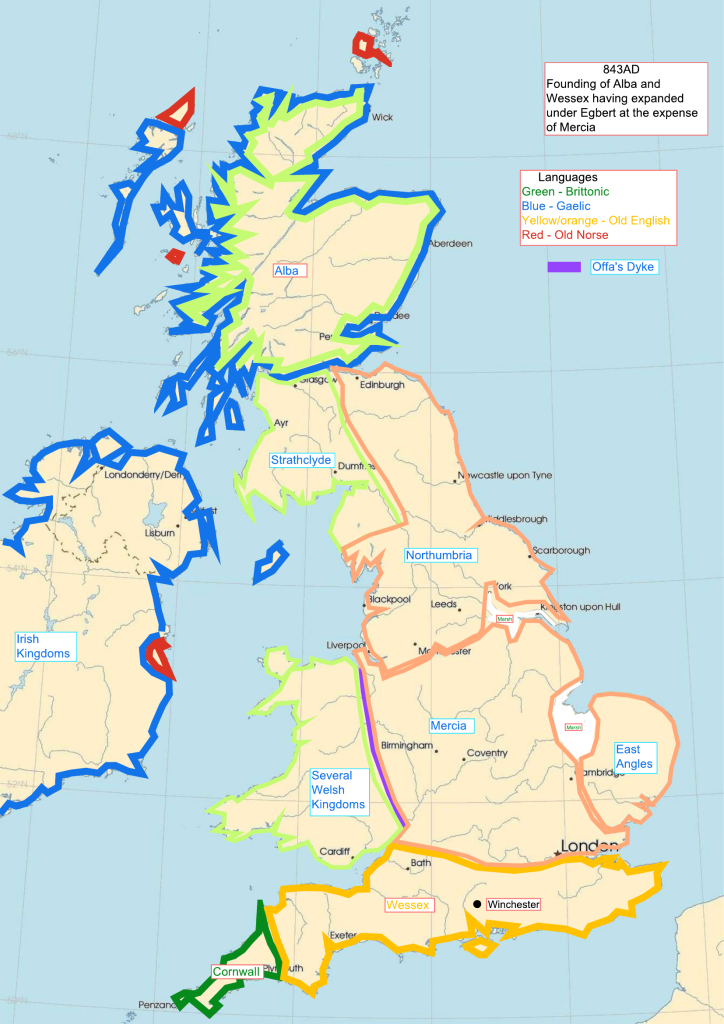
843
The Viking raids continued in the Hebridean islands and along the coast of what is now Scotland. This weakened the Picts and forced Kenneth MacAlpin the King of Dal Raita to invade Pictland and take over. It is generally taken that this took place in 843. Kenneth was then known as King of the Picts but the kingdom became Gaelic speaking. The extent of the kingdom at this time is unclear.
In the south Mercia fell into internal dispute and Wessex took further territory while the sub-kingdom of East Anglia had a revival. Northumbria also had several internal disputes.

886
In 865 the tactics and intentions of the Vikings changed and The Great Heathen Army invaded with the intent to settle in England. They were very successful winning many battles. Northern Northumbria was ignored after some stout defence from the Angles but most of England was over run and Alfred the king of Wessex, the last southern kingdom resisting, at his low point was forced into the Somerset marshes.
Alfred then won some battles and there were some internal disagreements in the Viking ranks with the Army splitting and further Heathen armies coming from Scandinavia and Denmark so by 886 Alfred was able to make a treaty with the Danish King Guthrum, an original copy of which is still held at Corpus Christi,Cambridge, with the boundary between the two kingdoms described.
The Vikings continued to occupy the islands around Britain and a large part of Ireland.
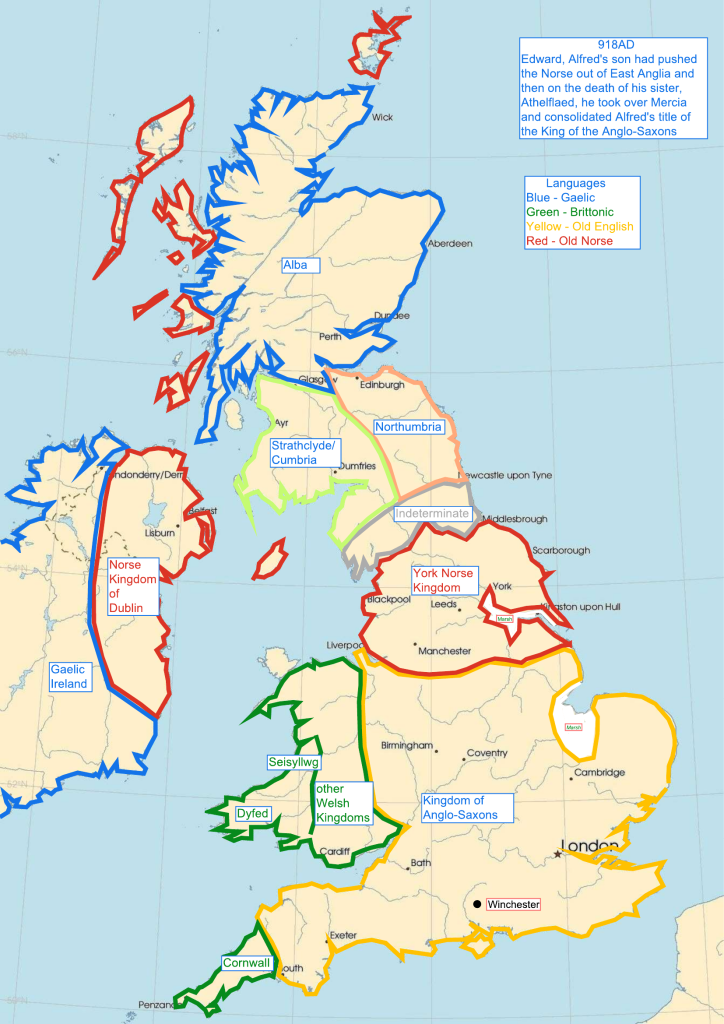
918
Alfred organised his land for defence creating taxes to maintain a standing army and over the years he pushed the Danelaw back. His son Edward inherited in 899 and was also a very capable king. There were many battles as Edward together with his sister Aethelflaed, The Lady of Mercia, took over parts of the Danelaw and partnered with other British kingdoms against the Vikings. In 918 Aethelflaed died and Edward annexed Mercia into a Kingdom of the Anglo-Saxons.
Constantine II inherited the Kingdom of the Picts in 900 and during his reign it came to be known as Alba, a Gaelic word. The first references to the Scots also occurred during his reign. In 918 he formed an alliance with Ealdred Lord of Bamburgh and fought the Viking king Ragnall at Corbridge on the river Tyne. The battle was indecisive but Ealdred retained Northumbria north of the Tyne and Ragnall took over York from the Danes. At the same time Ragnall’s kinsman Sihtric invaded and took over the Kingdom of Dublin.
Also in 918 Hywell Dda, King of Dyfed and joint king of Seisyllwg together with his brother Clydog, is recorded as having submitted to King Edward acknowledging Edward as an over-king.
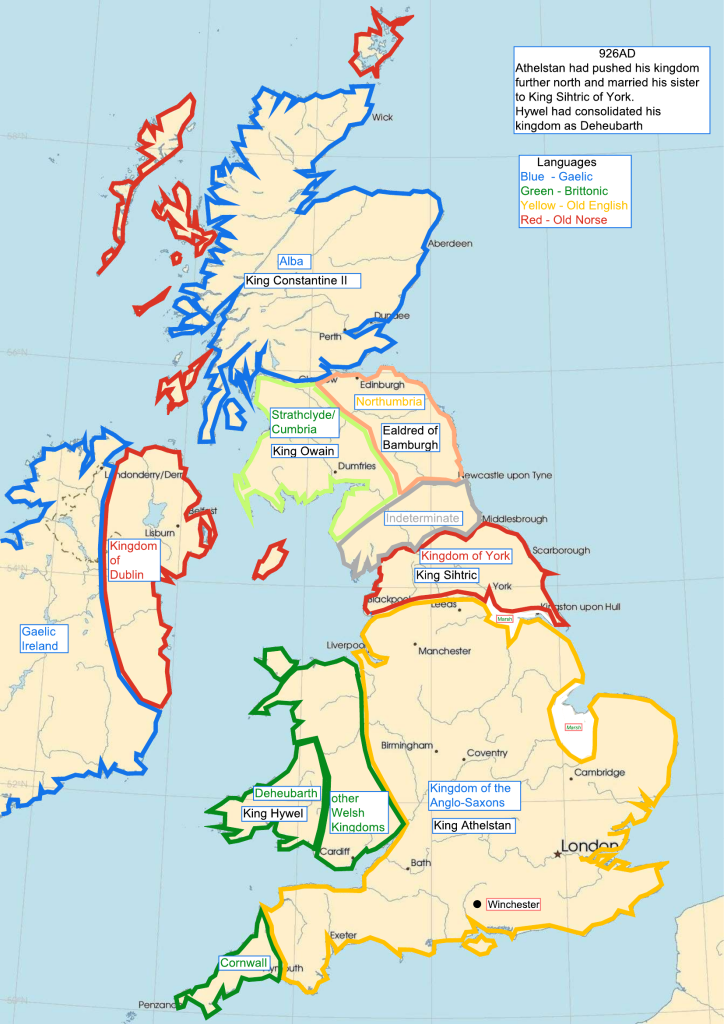
926
Athelstan inherited from his father Edward in 924 and consolidated his hold on power. He was the first British king to have a crown and an elaborate coronation ceremony in 925. In 921 Sihtric of Dublin had inherited the Kingdom of York from Ragnall and had left the Kingdom of Dublin to his kinsman Gofraid. In early 926 Sihtric married a sister of Athelstan’s at Tamworth and made some sort of treaty.
In 920 Hywel Dda had inherited the other half of Seisyllwg from his brother and consolidated both his kingdoms into Deheubarth.
927
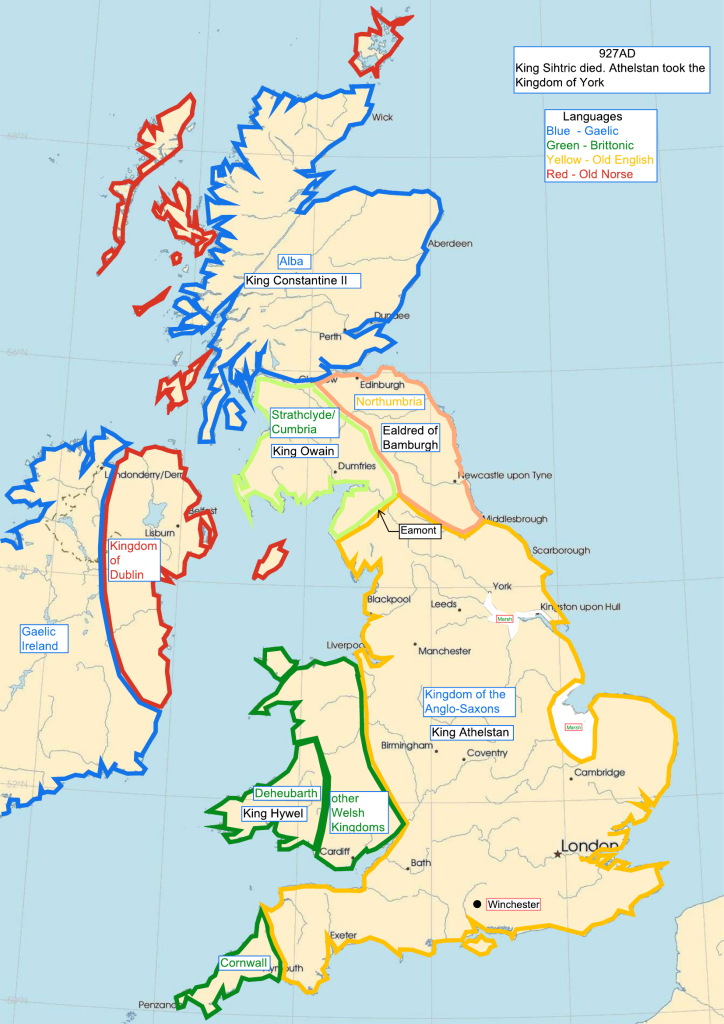
In early 927 Sihtric of York died. He had sons and also his kinsman Gofraid King of Dublin quickly left Dublin and went to York leaving Dublin in the charge of his sons. But the record of the Anglo-Saxon Chronicle simply says that Athelstan “took to the kingdom of Northumbria and governed all the kings that were in this island”. It is not known if there were battles but when Athelstan summoned the other kings to meet with him at Eamont he appeared to be in control of the Kingdom of York.
Six months after leaving Gofraid reappeared in Dublin and took back control of the kingdom.